Tutorial: How to make a fake mantelpiece, part 1
I wanted a fake mantelpiece for my craft show booth. I figured I'd hang booties on it. I looked everywhere and while I could find fake mantelpieces, they all (a) were very expensive, (b) had functional heaters where the fireplace should be, and (c) were not collapsible. So I designed and built my own. It comes apart into 5 pieces by pulling the pins on hinges. It will collapse flat enough to store underneath a bed. And it cost about $120 to make.
Here are the materials:

- pine board, 1x12, cut to 4' long
- pine board, 1x8, cut into 2 pieces 4' long
- MDF boards, 1x8, cut into 1 piece 3'6" long and 2 pieces (4' - the width of a 1x8) long
- one piece of plywood-like substance, approximately 2'x4' (I used a scrap piece but you could use real plywood or particle board)
- (not pictured) 10' of molding of your choice (I used MDF baseboard molding)
- (not pictured) 8' of crown molding
- 9 12"x12" self-adhesive linoleum tiles that look like real stone tiles
- two square "bullseye" blocks
- 10 brass hinges with removable pins
- 3/4" screws
- finish nails
- wood glue
- (not pictured) black fabric
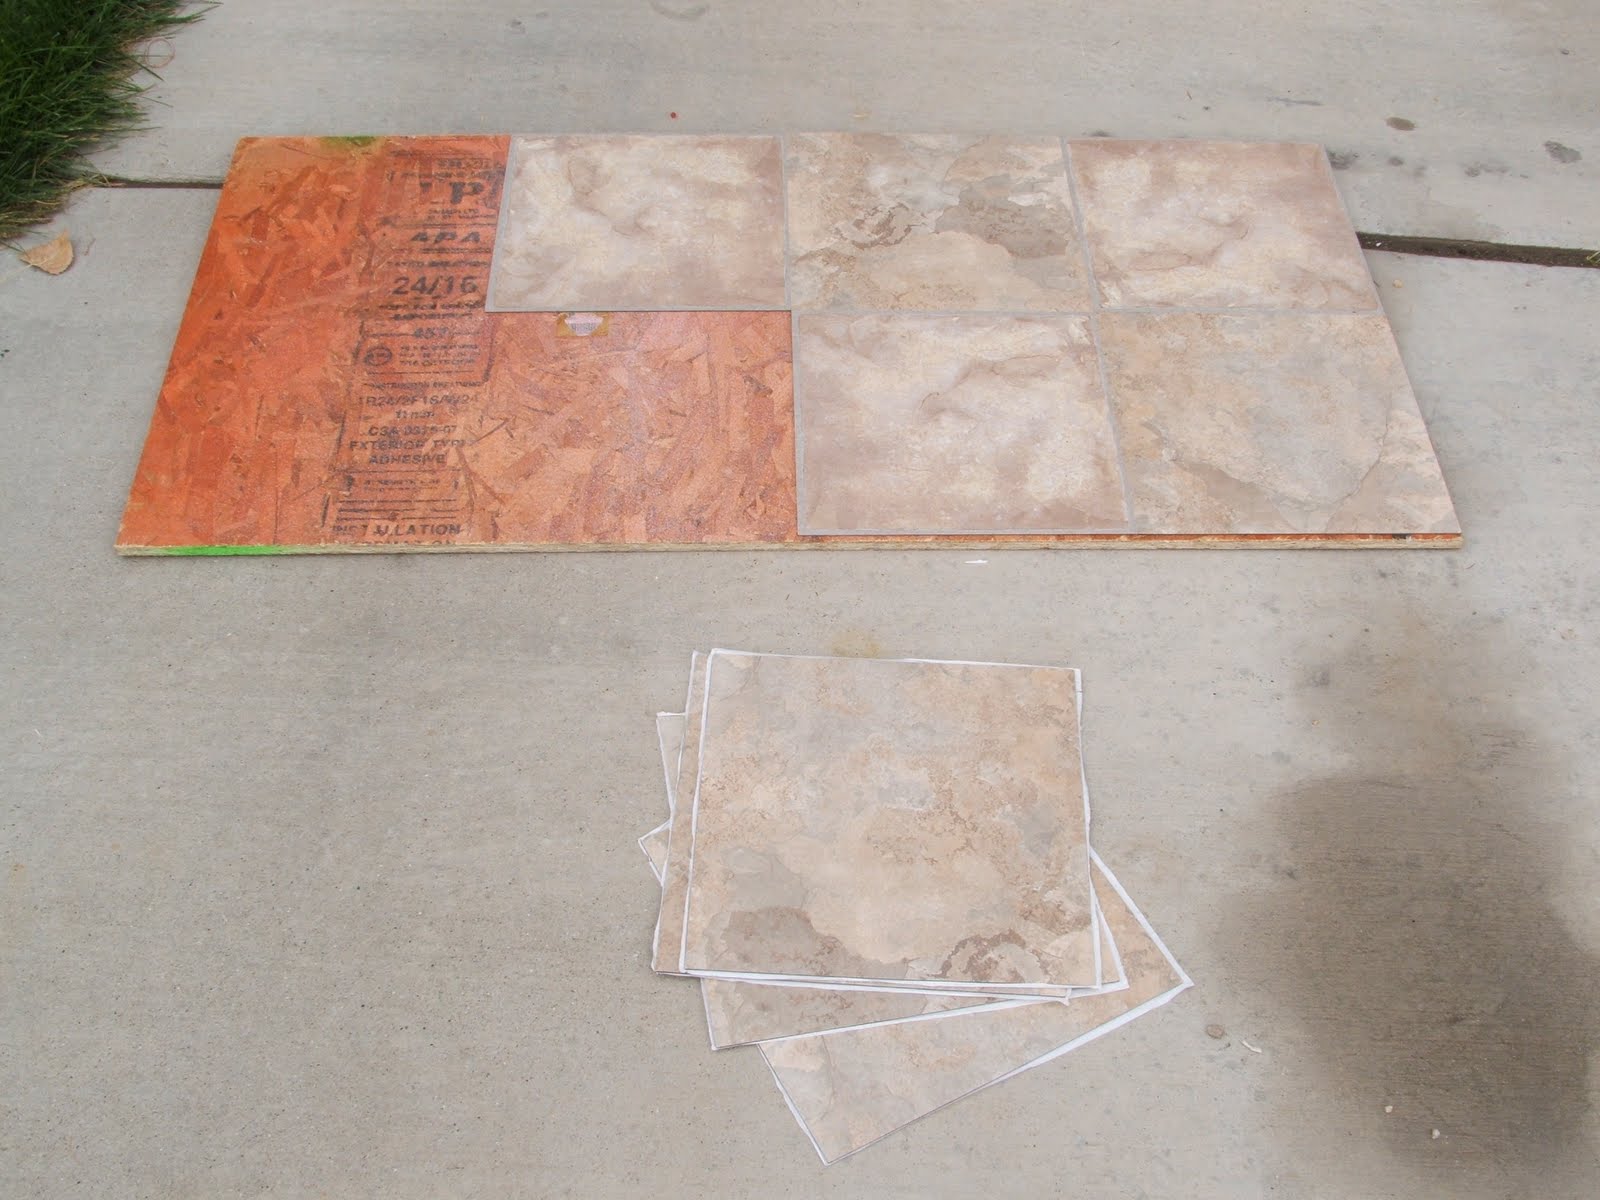 First, prepare the "hearth". Stick 8 of the tiles on the plywood base.
 Cut the 9th tile in strips and stick them on the sides of the base.
 Cut the molding to the right lengths. Two pieces the same length as the two MDF boards, and one piece the right size to fit in between the bullseye blocks across the top.
 Line up the pieces of the front. Attach the molding and the bullseye blocks with glue and/or finish nails. You will have one piece of molding on each of the side front pieces, and on the top front piece you will have one piece of molding and two bullseye blocks.
I will post Part 2 later.
posted by Nom de Blog @ 10:48 AM
|
![]()
![]()


